Article: Directory: Manage Entities content
The Directory system allows school and clinical site coordinators to create and manage partner entities (schools, clinics, etc.) that do not use ACEMAPP. This guide will walk you through adding and closing Directory Entities.
Adding a Directory Entity
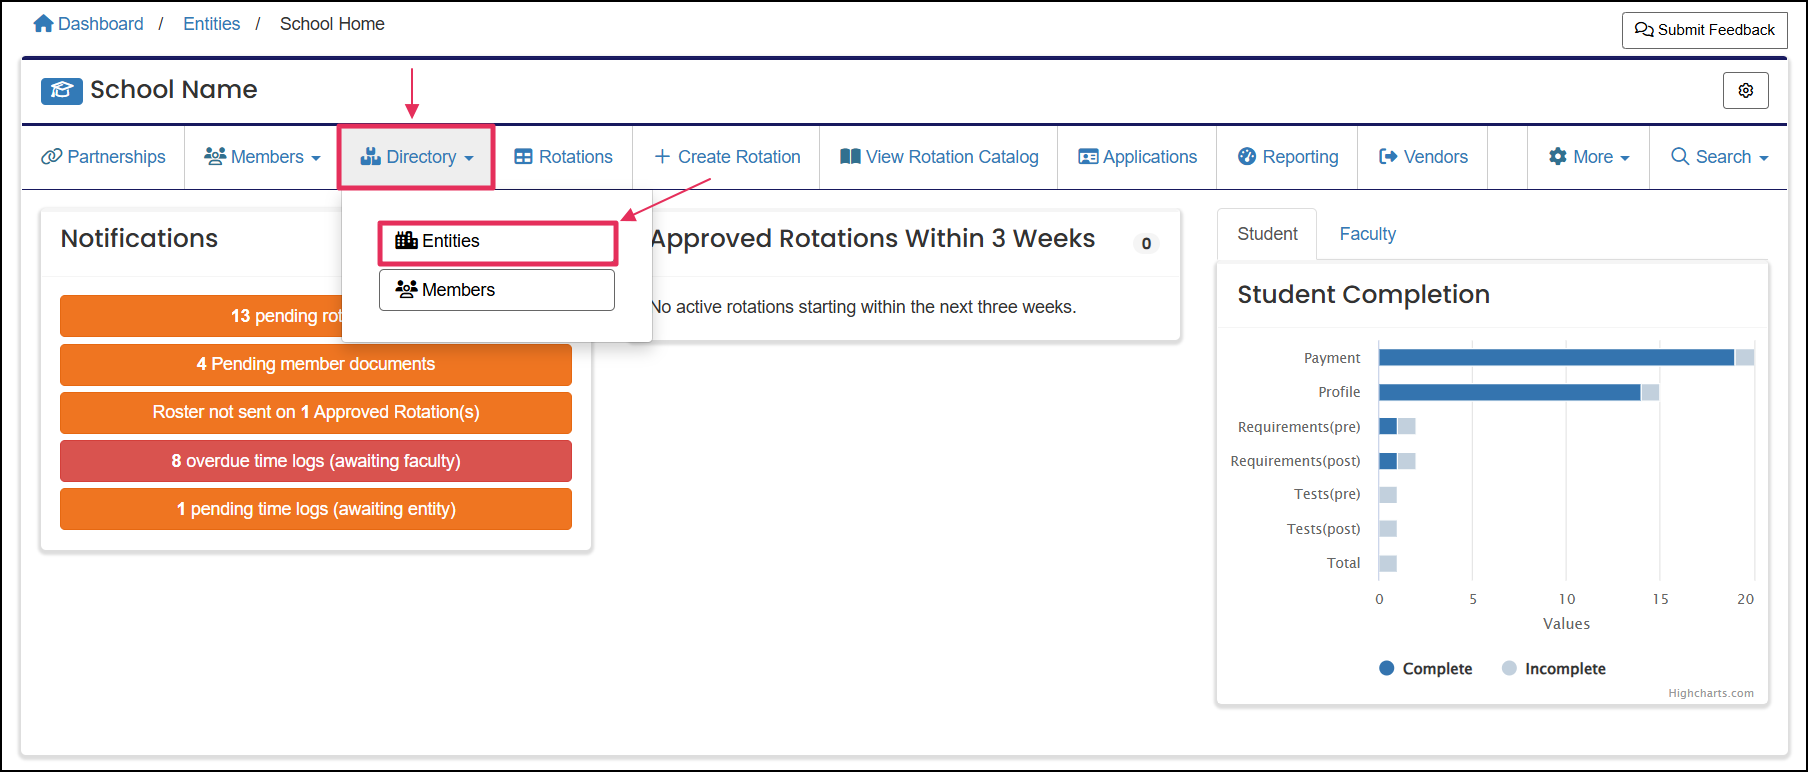
Step 1: Open the "Directory Entities" Menu
From your homepage, click the "Directory" drop-down menu from the navigation bar and select the "Entities" option.
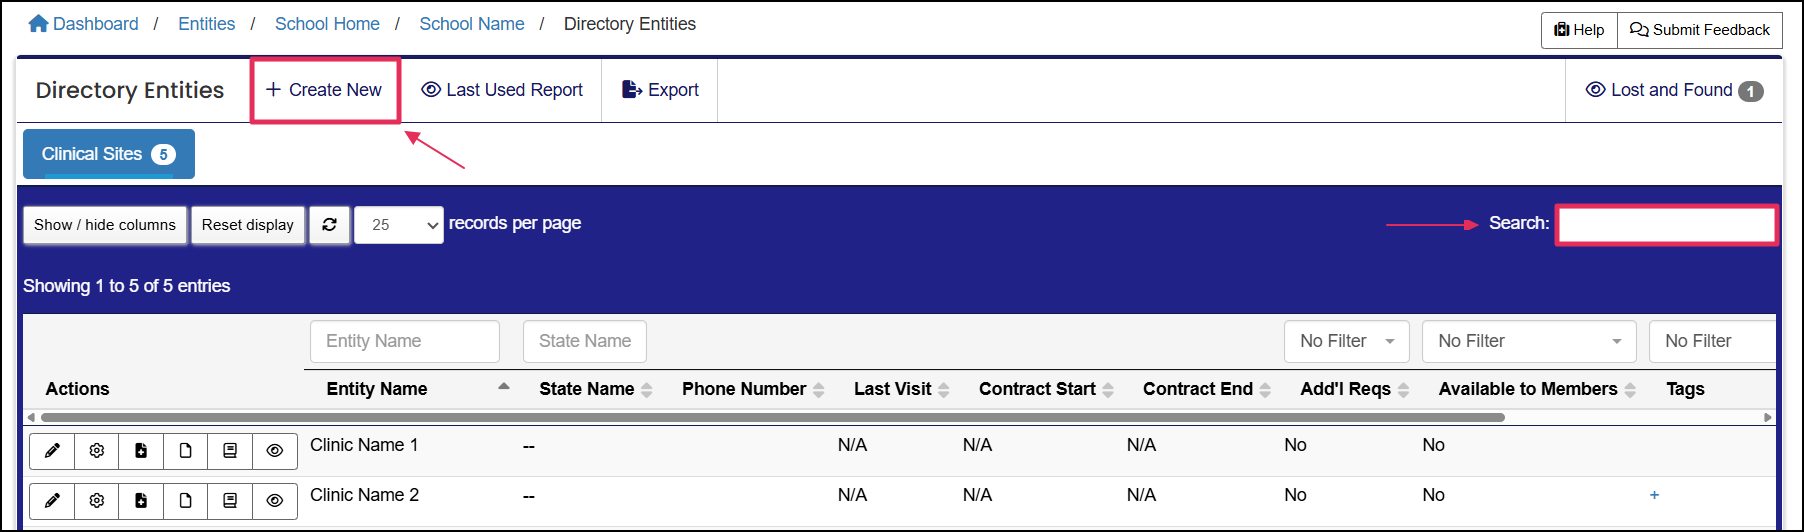
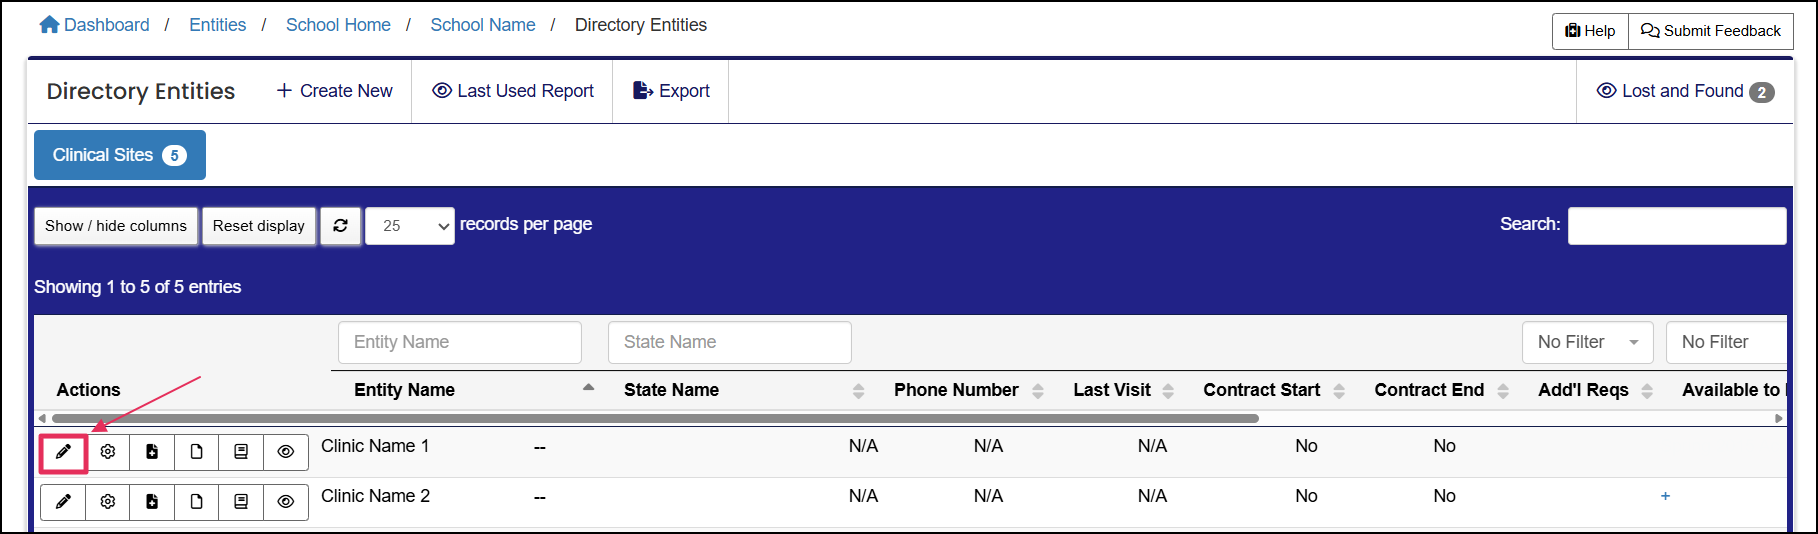
Step 2: Check for Existing Entities or Create New
In your Directory Entities table, review the list to check if the entity already exists. You can also use the search bar in the top-right corner to look it up.
If you confirm the entity has not been created, click the "Create New" button at the top-left of the table to add it.
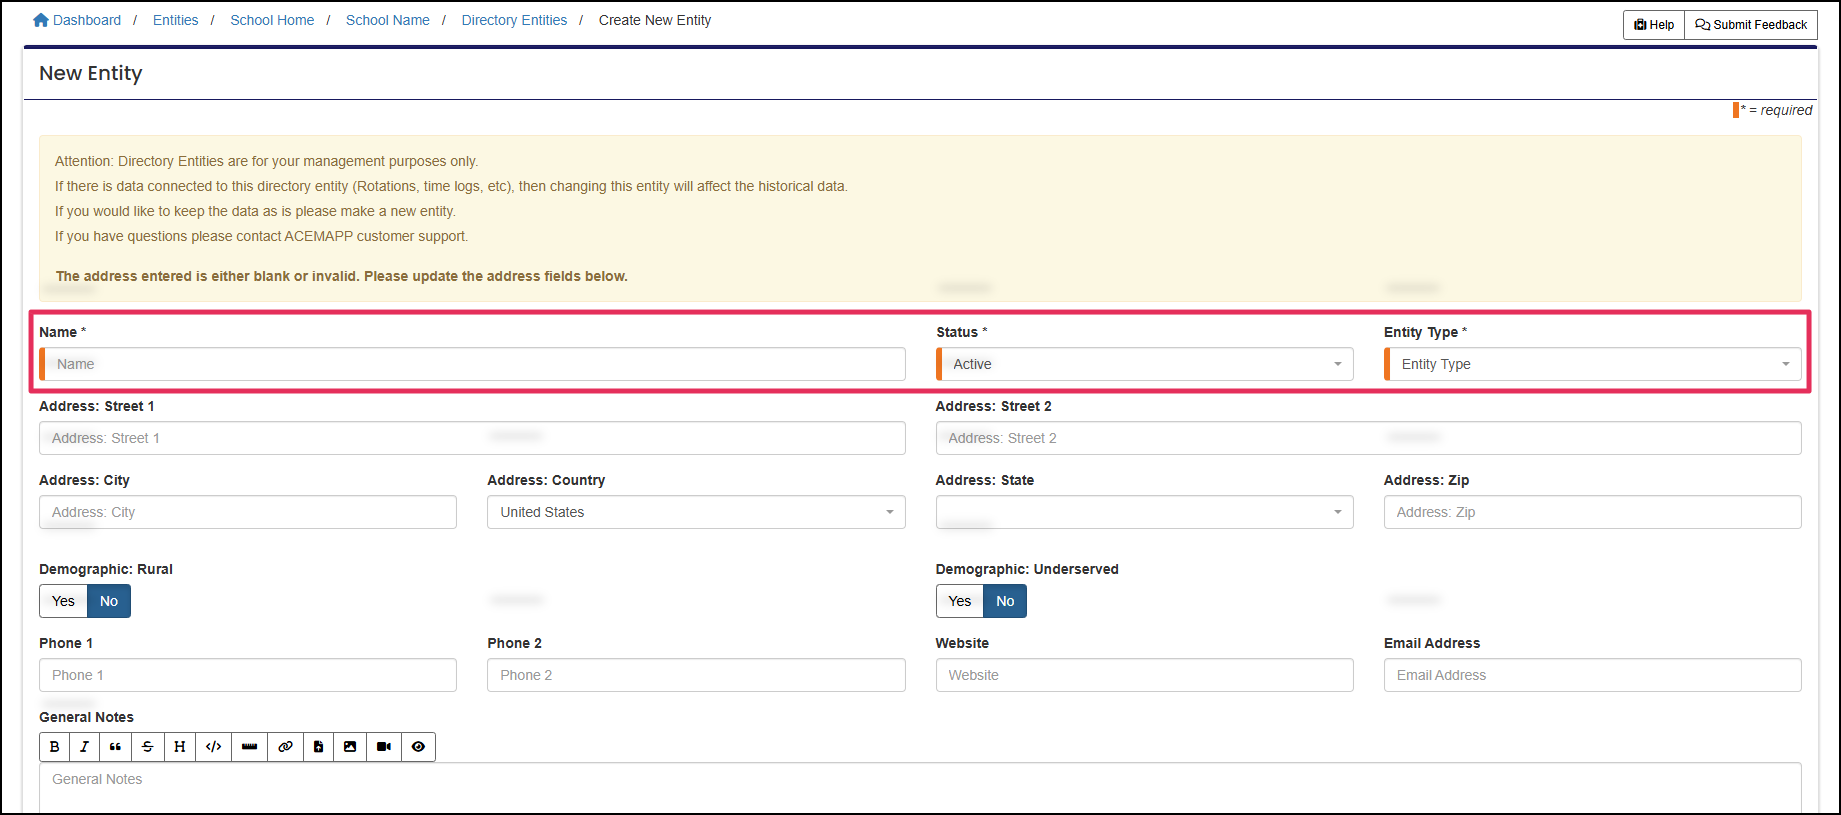
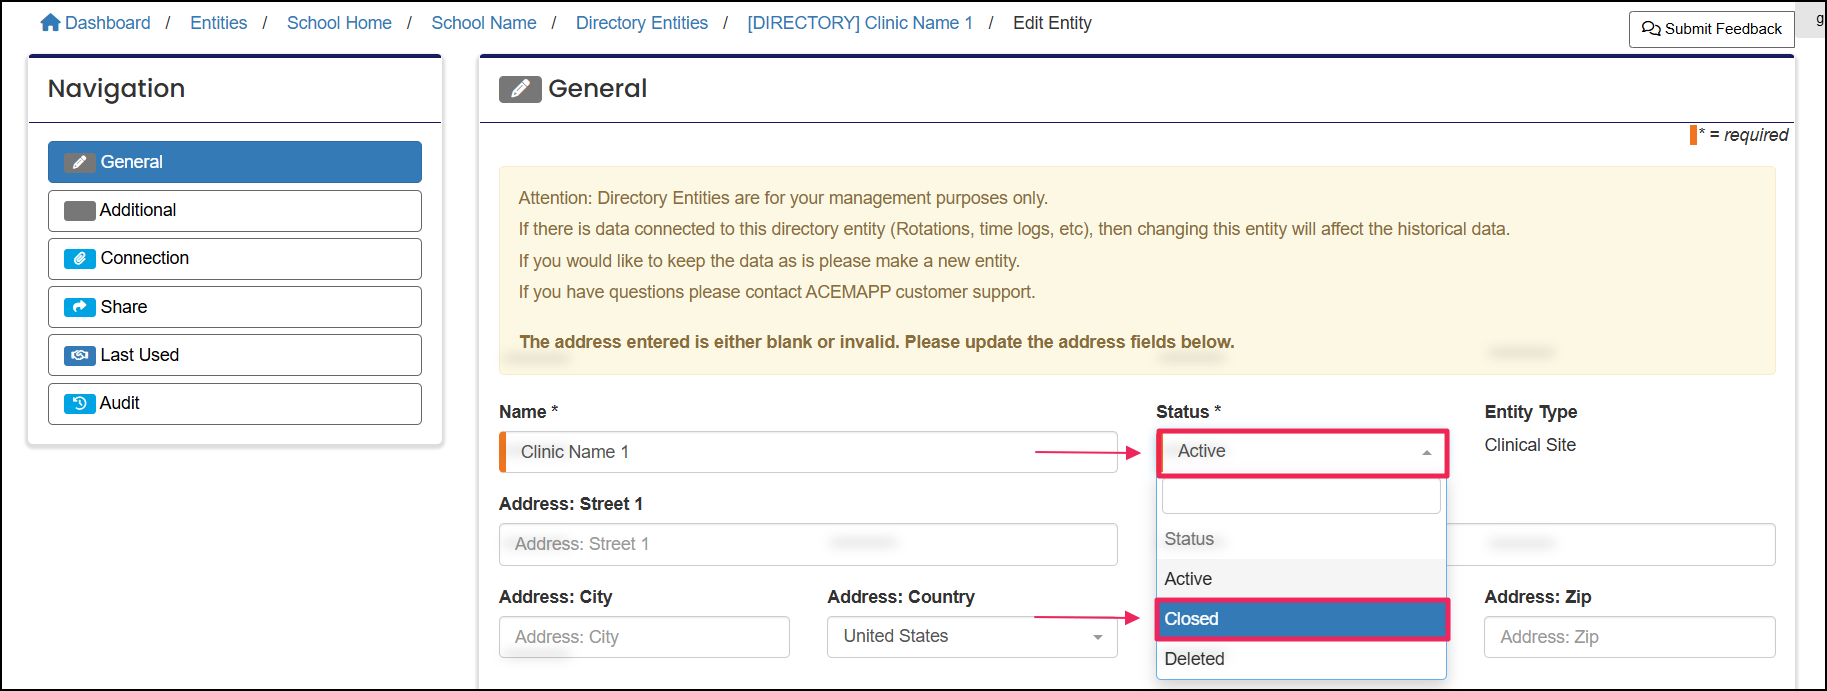
Step 3: Fill Out Basic Entity Information
In the Create New Entity form, enter the entity’s Name, select its Status (Active, Closed, or Deleted), and choose the Type (Clinical Site or School).
You may also add optional details such as the address, contact information, and any relevant notes.
When finished, click the green "Save" button located at the bottom-left of the form.
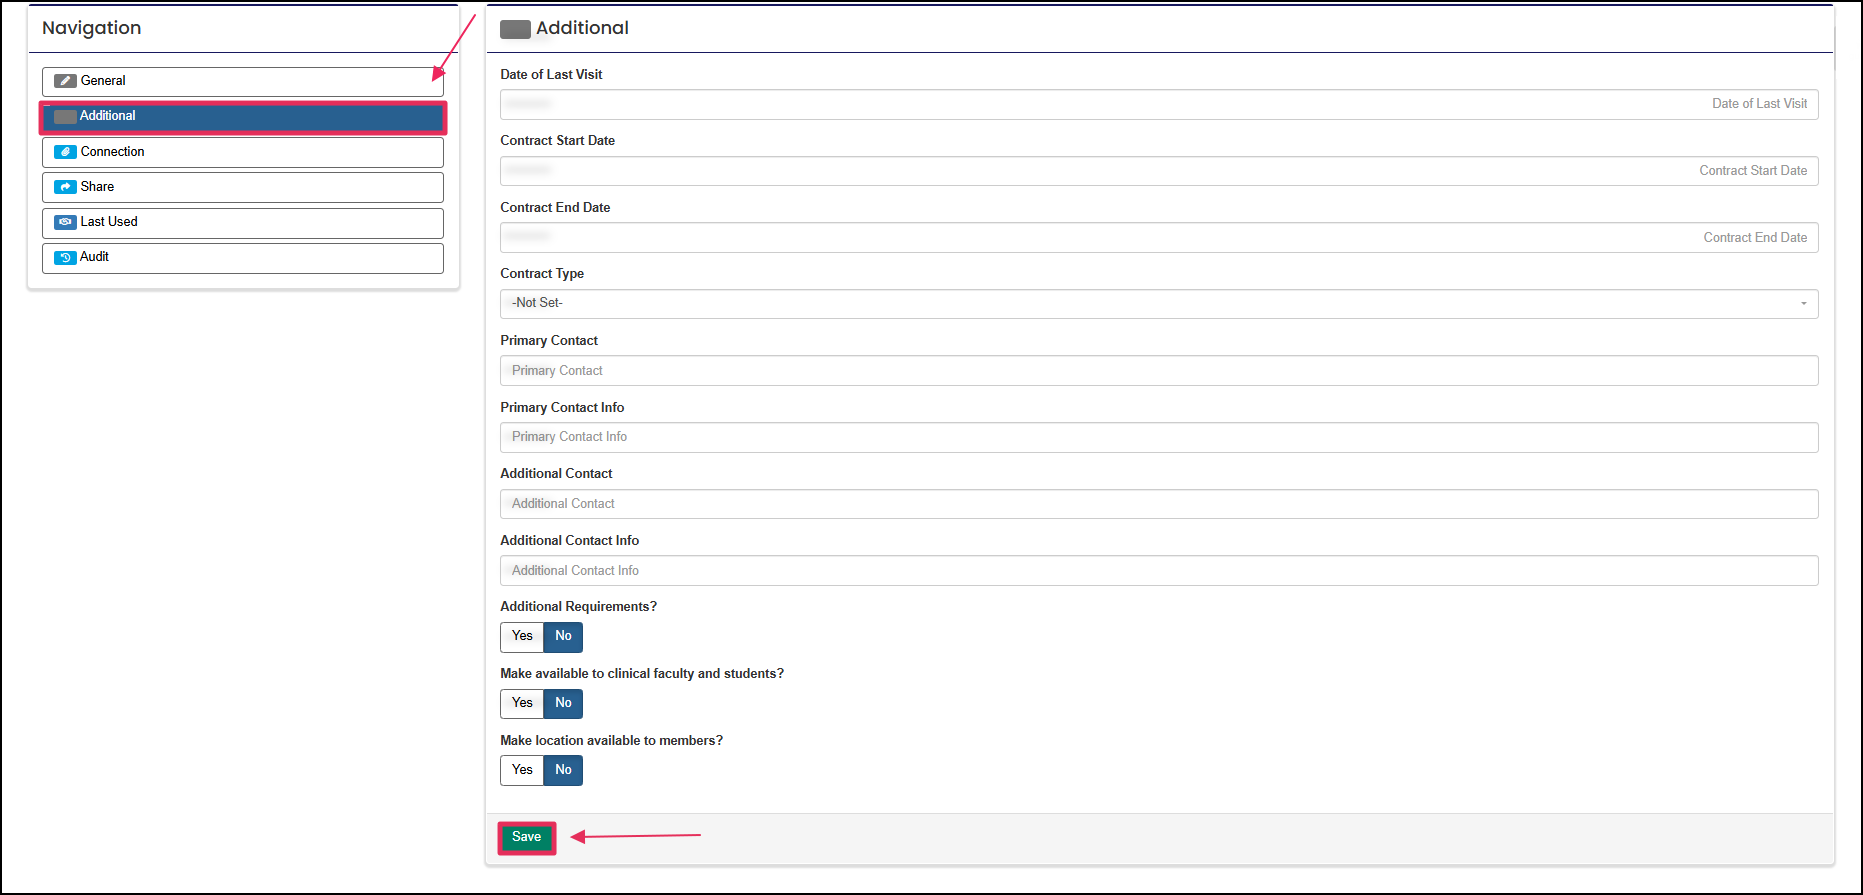
Step 4: (Optional) Add Detailed Entity Information
After saving the Create New Entity form, you can access the "Additional" tab under the Navigation menu in the top-left corner.
In this tab, you can enter more detailed information about the Directory Entity, such as:
- Site visit details
- Contract start and end dates
- Contact information
- Additional requirements
Once done, click the green "Save" button at the bottom.
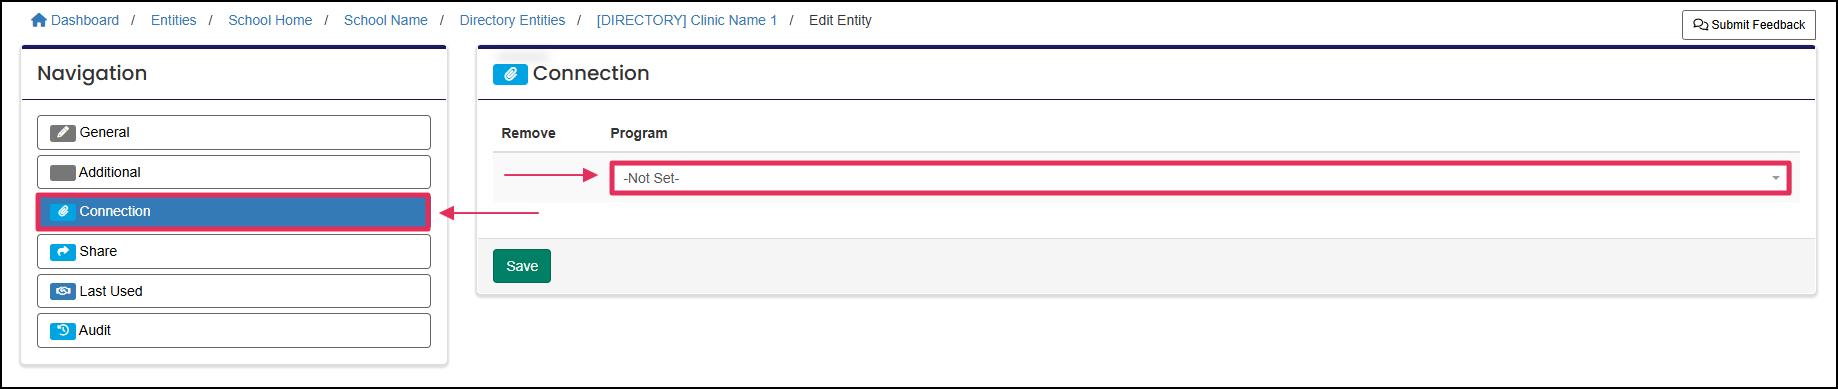
Step 5: Assign the Entity to a Program (ConnectionTab)
The "Connection" tab allows you to link the Directory Entity to a specific program, making it active and accessible to all associated members (students, faculty, etc.).
To activate the entity:
- Select the appropriate program.
- Click the green "Save" button.
Note: The entity will not be activated unless a program is selected.
Step 6: Manage Entities via "Lost and Found"
If you see a number next to the "Lost and Found" button in the top-right corner of your Directory Entities table, it means one or more entities are not activated.
To view and manage these unlinked entities, click the "Lost and Found" button.

Step 7: Edit an Entity from Lost and Found
In your Lost and Found table, find the entity you want to manage and select the "Edit" (Pencil) icon.

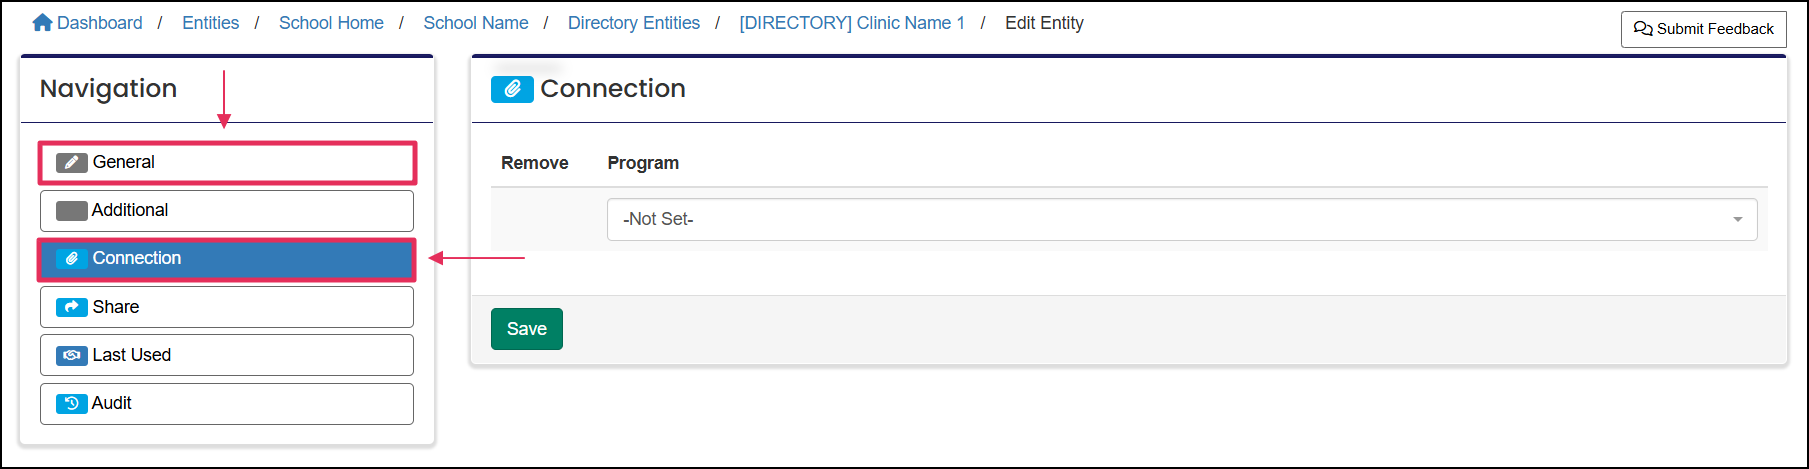
Step 8: Activate or Close the Entity
To activate your Directory Entity, click the "Connection" tab to connect it to a program.
To delete your Directory Entity, click the "General" tab and update its status from Active to Closed or Deleted.
Closing a Directory Entity
Step 1: Open the Entity for Editing
From the Directory Entity table, click the "Edit" (Pencil) icon next to the entity you wish to close.
Step 2: Update the Status to “Closed”
In the Status field, update the status to Closed.
Note:
- Closing an entity will remove it from future selection, but any existing data or reports linked to it will remain accessible.
- Deleting an entity will permanently remove it and erase all associated data.
An Entity is a School, Clinical Site, High School, Company, etc.
An Entity is a School, Clinical Site, High School, Company, etc.
An Entity is a School, Clinical Site, High School, Company, etc.
An Entity is a School, Clinical Site, High School, Company, etc.
An Entity is a School, Clinical Site, High School, Company, etc.
An Entity is a School, Clinical Site, High School, Company, etc.
An Entity is a School, Clinical Site, High School, Company, etc.
An Entity is a School, Clinical Site, High School, Company, etc.
An Entity is a School, Clinical Site, High School, Company, etc.
An Entity is a School, Clinical Site, High School, Company, etc.
A requirement is an item a member may need to complete based on their affiliation to an entity or rotation assignment.
An Entity is a School, Clinical Site, High School, Company, etc.
An Entity is a School, Clinical Site, High School, Company, etc.
An Entity is a School, Clinical Site, High School, Company, etc.
An Entity is a School, Clinical Site, High School, Company, etc.
An Entity is a School, Clinical Site, High School, Company, etc.
An Entity is a School, Clinical Site, High School, Company, etc.
An Entity is a School, Clinical Site, High School, Company, etc.
An Entity is a School, Clinical Site, High School, Company, etc.
An Entity is a School, Clinical Site, High School, Company, etc.
An Entity is a School, Clinical Site, High School, Company, etc.
